SIX SECOND ANIMATED FILM STRIP
THINGS YOU NEED
Adobe Photoshop - to create your images.
Adobe Media Encoder - to convert frames to movies.
Adobe Premiere Pro - or an equivalent editing software if you're working with music.
Drawing Tablet Recommended - While you can have some fun drawing with your mouse the Photoshop brushes work best with a tablet and pen.
32 GB RAM or greater - The Film StripHD.atn script generates a larger than 10K x 20K file.
Music to Animate too - freeplaymusic.com
Free Photoshop Brushes - brusheezy.com
INSTRUCTIONS
VIDEO 1 - SET-UP, ANIMATE, EXPORT & CONVERT
VIDEO 2 - DOWNLOAD & LOAD PHOTOSHOP BRUSHES
B. OPEN NEW PHOTOSHOP PROJECT/FILE AND CREATE FILMSTRIP
C. COMPRESS LAYERS, RUN CROPPING SCRIPT AND EXPORT FRAMES
D. CREATE MOVIE WITH ADOBE MEDIA ENCODER
E. LOADING AUDIO WAVE GRAPHICS FOR SYNCING TO AUDIO
F. CREATING AUDIO WAVE GRAPHICS FOR SYNCING TO AUDIO (ADVANCED)
A. SET UP PHOTOSHOP TOOLS
1. Download FILM STRIP HD.atn file
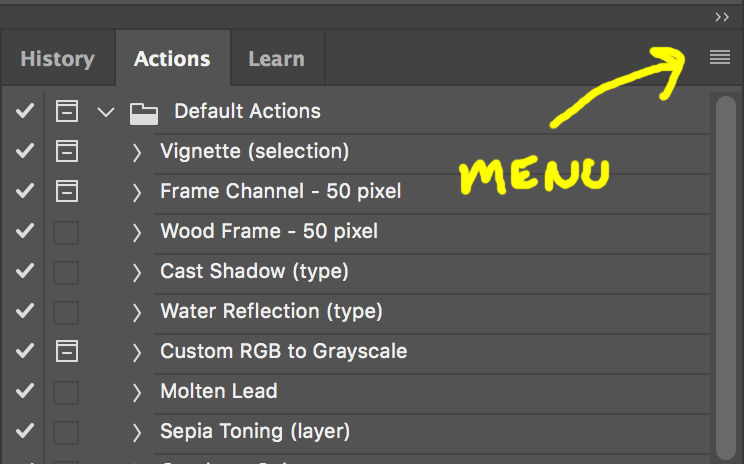
2. Go to the Photoshop/Window menu in the top toolbar and check the following panels: Action Script, Brushes, and Layers.
3. Load .atn file from the Actions panel menu. Load Action Scripts. . .
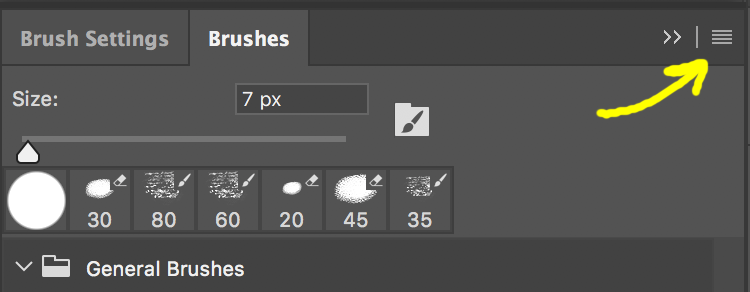
4. Download free Photoshop brushes here. Save them to your hard drive in a Photoshop "Tools" folder and then import from the Brush menu. Import Brushes. . .
B. OPEN NEW PHOTOSHOP PROJECT/FILE AND CREATE FILMSTRIP
1. Open new PSD document. Use the default 7in x 5in 300dpi. Save it to a project folder. You'll be adding folders to this later.
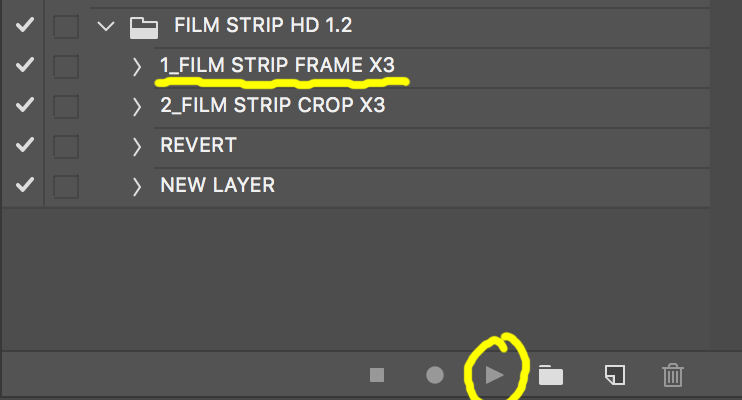
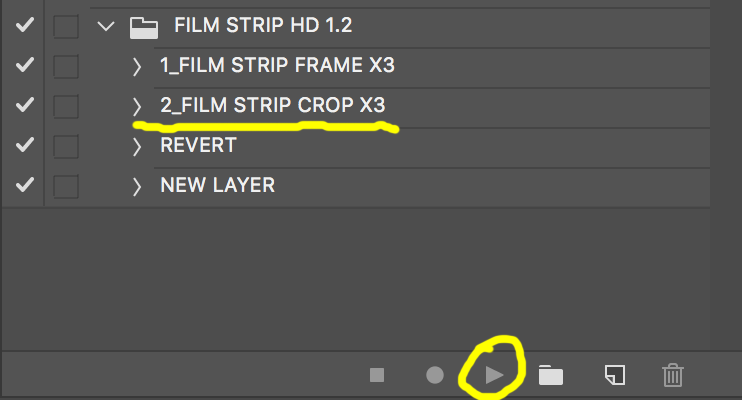
2. Run "1_Film Strip Frame x3" action script and then Zoom out to full frame with (Cmd 0) .
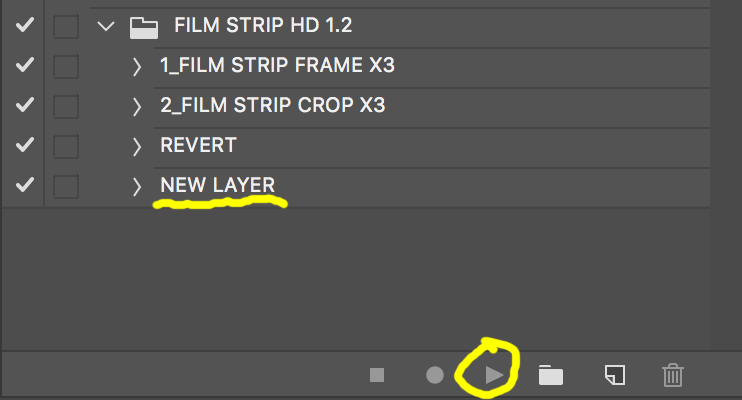
3. Choose a brush and color and begin drawing on "layer 0" under the "Frame" layer. You can add layers with the "Add Layer" action.
4. When you are finished drawing remember to SAVE YOUR FILE.
C. COMPRESS LAYERS, RUN CROPPING SCRIPT AND EXPORT FRAMES
1. If you have multiple layers compress to single layer by selecting them and using the merge layer command (Cmd E). Do NOT include the "Frame" layer. You should now have a "Frame" layer and a single "Layer 0" layer. DO NOT SAVE.
2. Zoom out with (Cmd 0) to full frame.
3. Run "2_Film Strip Crop x3" action script. Each frame will be distributed to its own layer and cropped to 1920 x 1080.
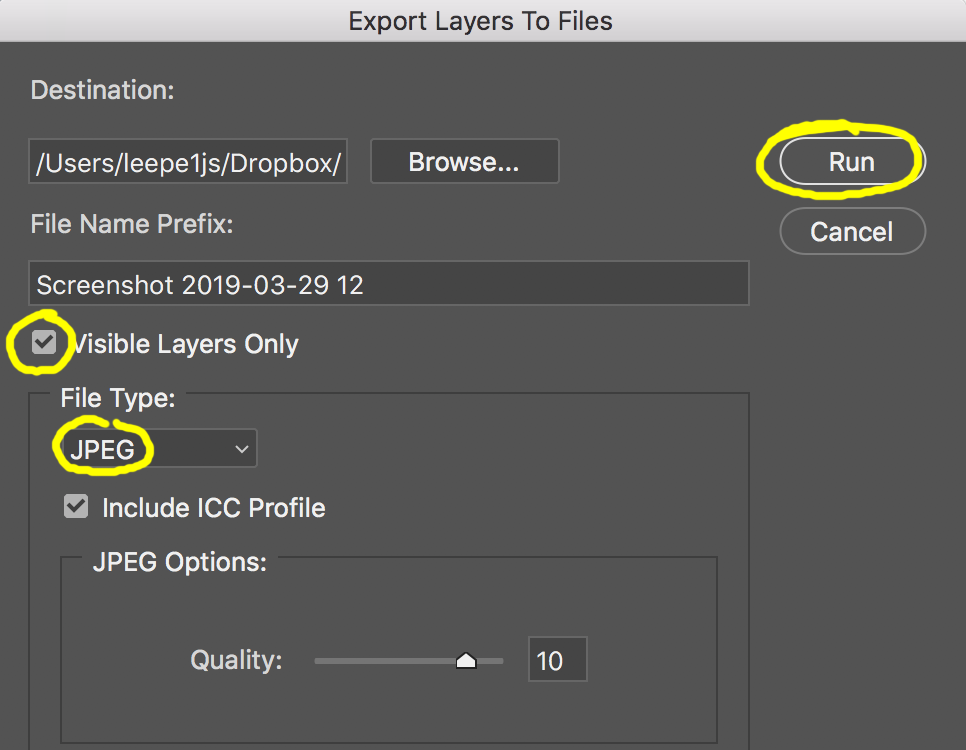
4. Go to File/Export/Layers to Files . . . export as .jpg files. Browse to your project folder and create a new "Frames" folder. Check "Visible files only". Click on "Run". Browse to your Frames folder in Adobe Bridge to get a visual on your exported frames. You should have 72.
D. CREATE MOVIES WITH ADOBE MEDIA ENCODER
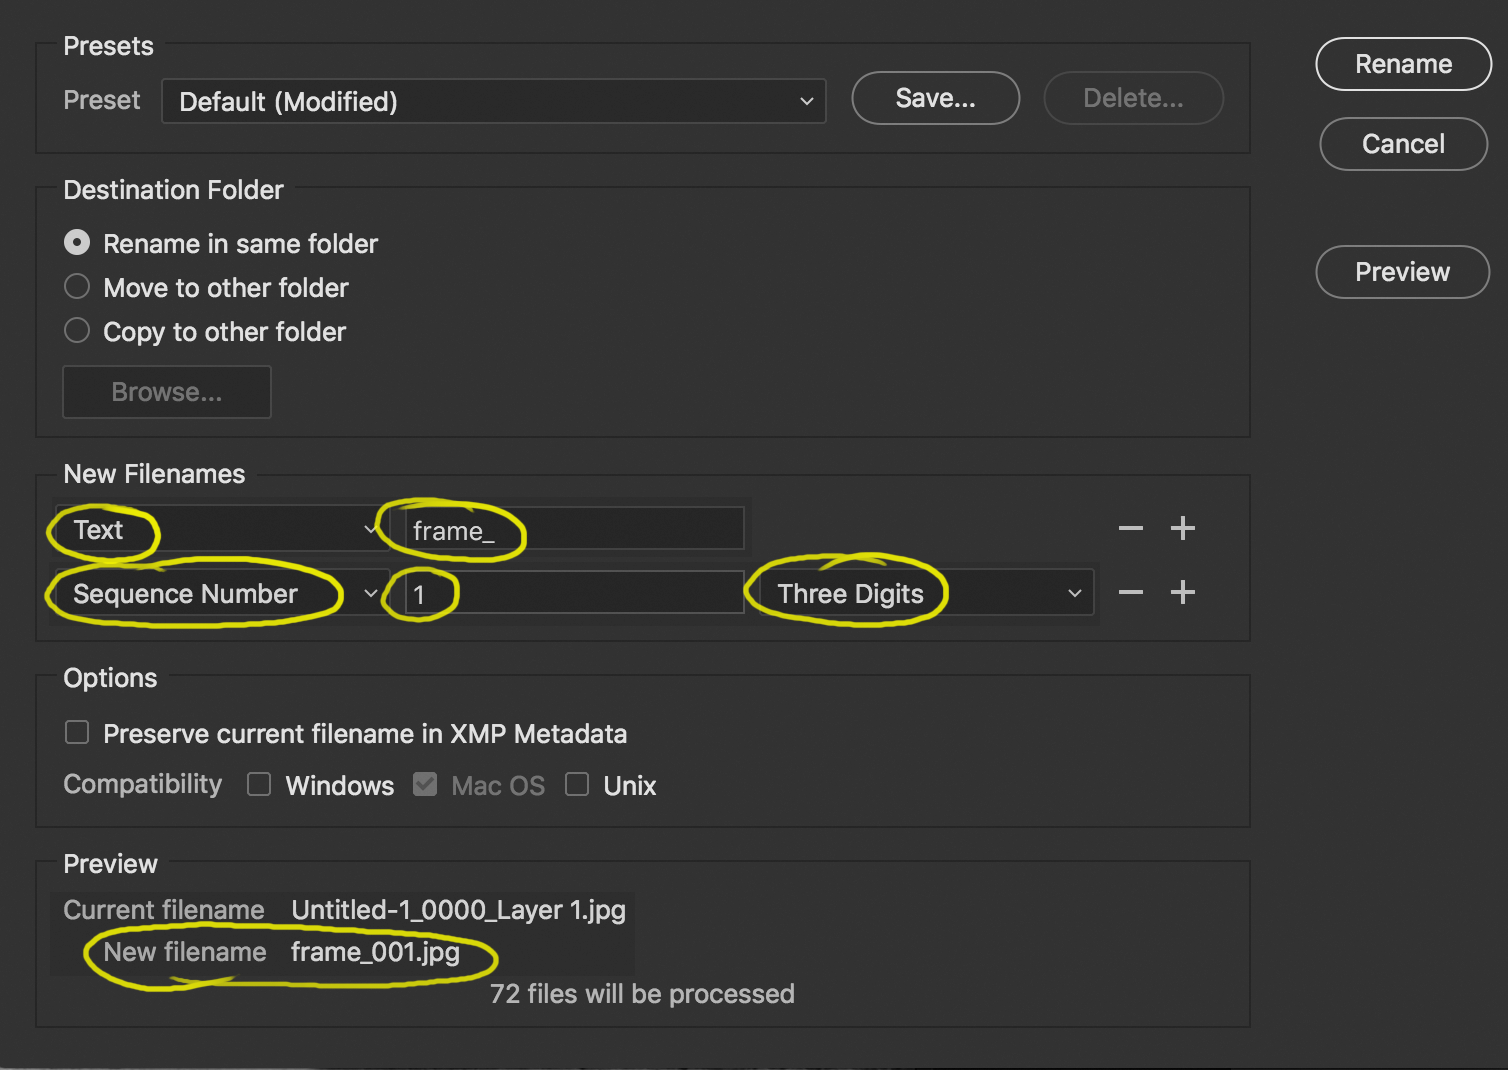
A. Batch Rename Frames: Before we can convert your frames to a movie we will need to simplify the fienames with Batch Rename in Adobe Bridge. Open Adobe bridge and browse to your Frames folder. Select all and right mouse and select Batch Rename. Follow the yellow circles to fill in the settings and click on Rename.
B. Convert Frames to Movie: Follow this video tutorial for complete instructions. How to Import and Render an Image Sequence in Adobe Media Encoder
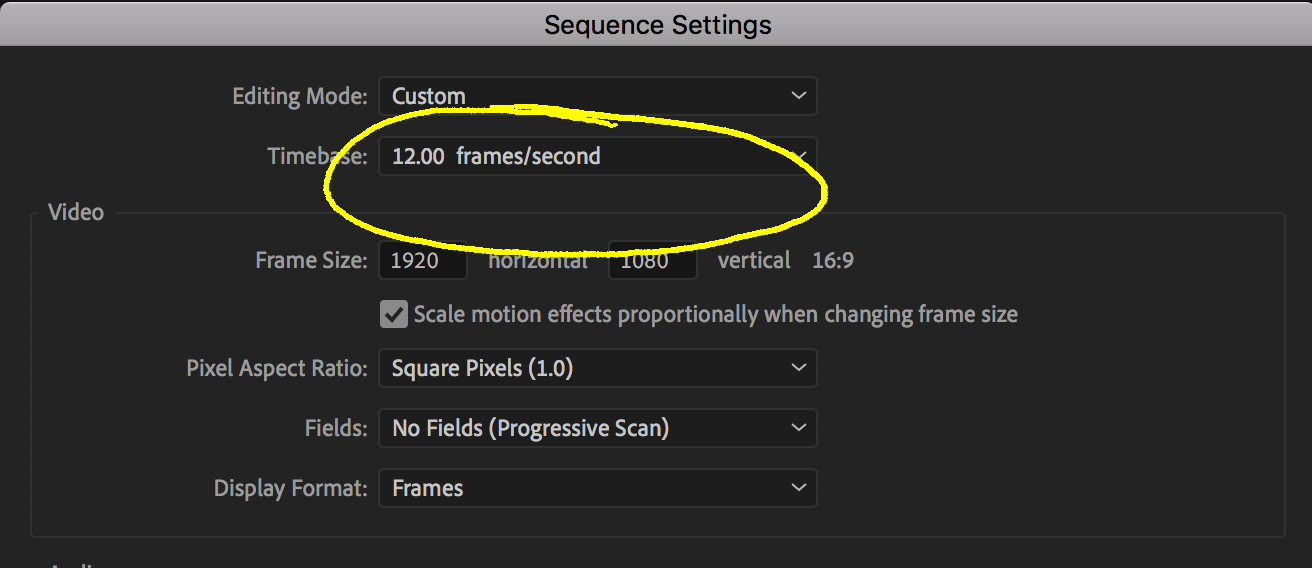
You'll want to change your export settings to 1920 x 1080 HD at 12 Frames per Second.
E. CREATING AUDIO WAVE GRAPHICS FOR SYNCING TO AUDIO (ADVANCED)
If we haven't lost you yet you may be ready to take your animation to the next level by animating to a specific audio file with frame-by-frame accuracy. The trick to this is all in the set-up, which is a bit tedious, but what part of making films one-frame-at-a-time isn't tedious. :-).
1. Setting up a Project File Structure: You can imagine that breaking music down into six second sound bites could get a little complicated, so file naming and organization is crucial. You can download a zip file of an entire sample project file structure here as a template that you can build on to set up your files before animating.
2. Breaking down the Audio File: To begin breaking down your audio you will need to load your original file into premiere and create a 12 fps sequence. The rest of the settings don't really matter since we will only be using Premiere to break down our audio into 6 second clips (72 frames) the same frame count as the six-second film strip template.
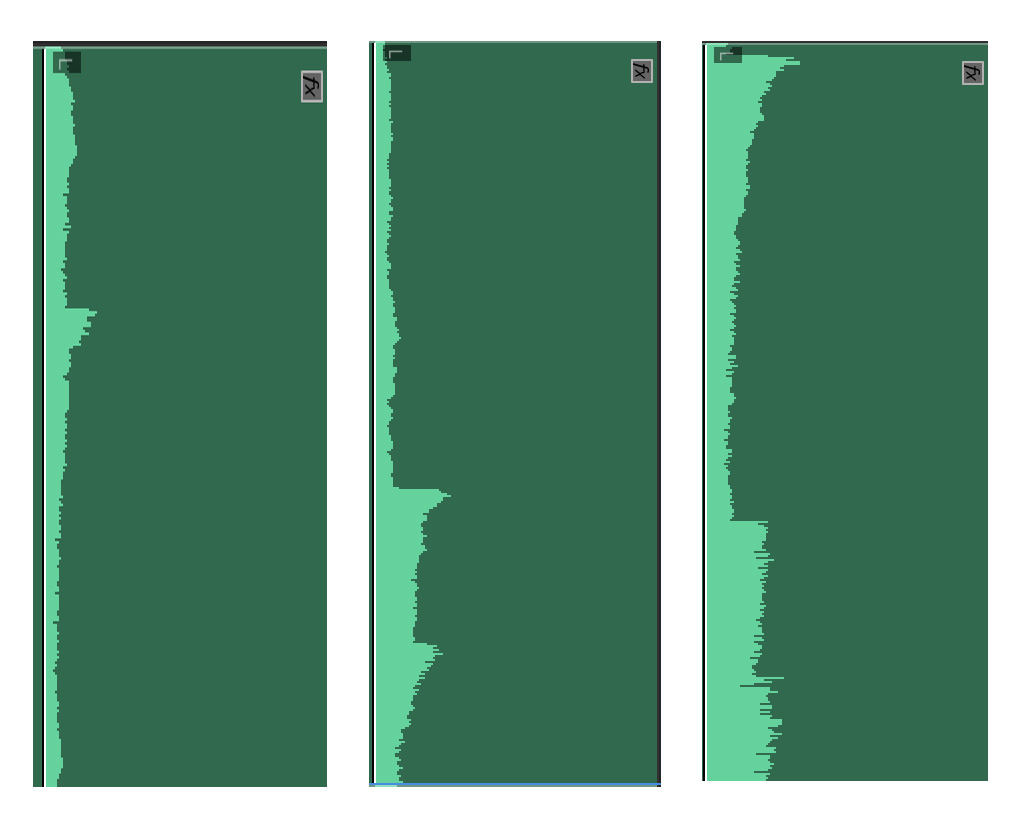
3. Frame-grabs of of the Audio Wave Graphics: From there, you'll break each 6 second clip into thirds and do a frame grab (cmd/shift/4) of each wave file in your sequence timeline (see below).
Once I have my frame-grab files stored in their respective folders, I use Adobe Bridge "Batch Rename" and "rotate tool" finish them.
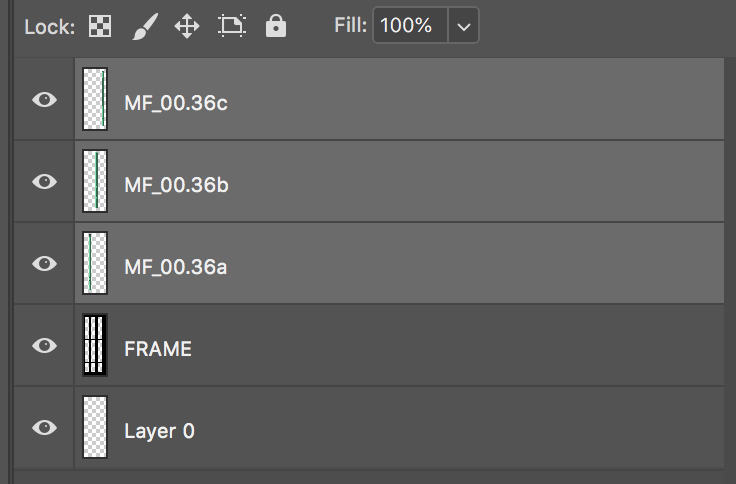
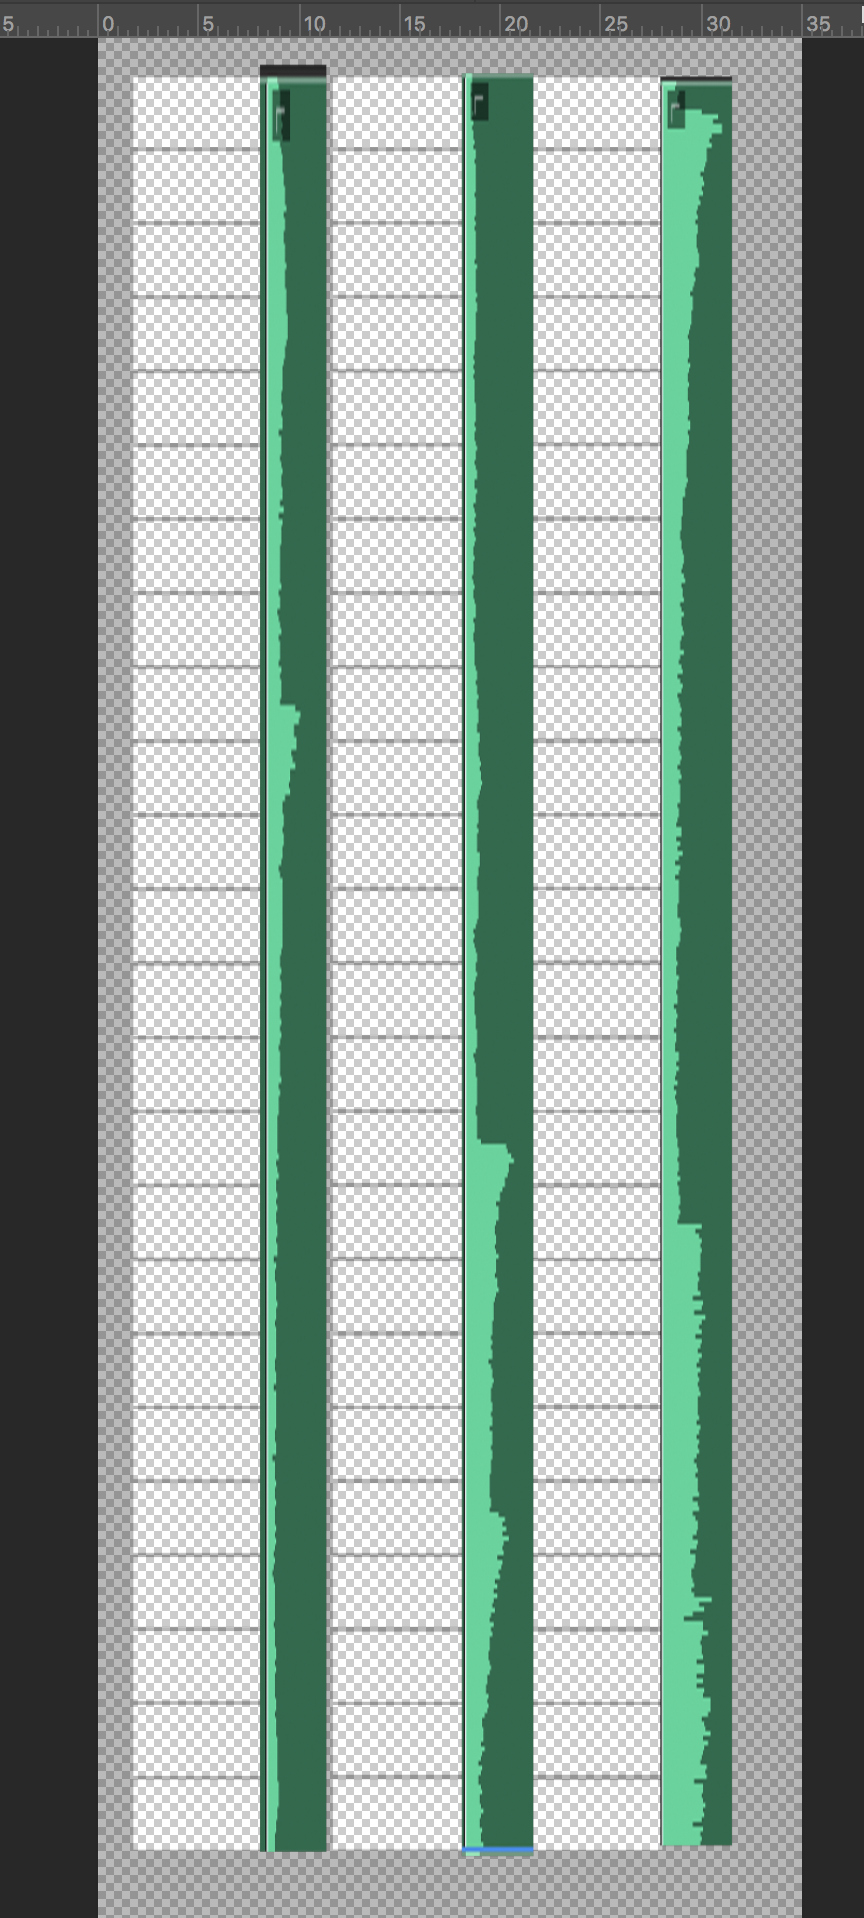
4. Loading Wave Graphics: Finally, you can now load the wave Graphics into your working Photoshop file and use the transform tool (cmd T) to stretch and align each graphic alongside the frame template.
5. Once set up, name and save the .PSD file in the apropriate project folder. If this were my first six-second clip I would save it as 00.psd in my seconds - 00.00 folder.
F. CREATING AUDIO WAVE GRAPHICS FOR SYNCING TO AUDIO (Advanced - Coming Soon)
Stephan Leeper/Central Michigan University 2019